>>
30-MINUTE MEALS! Get the email series now →


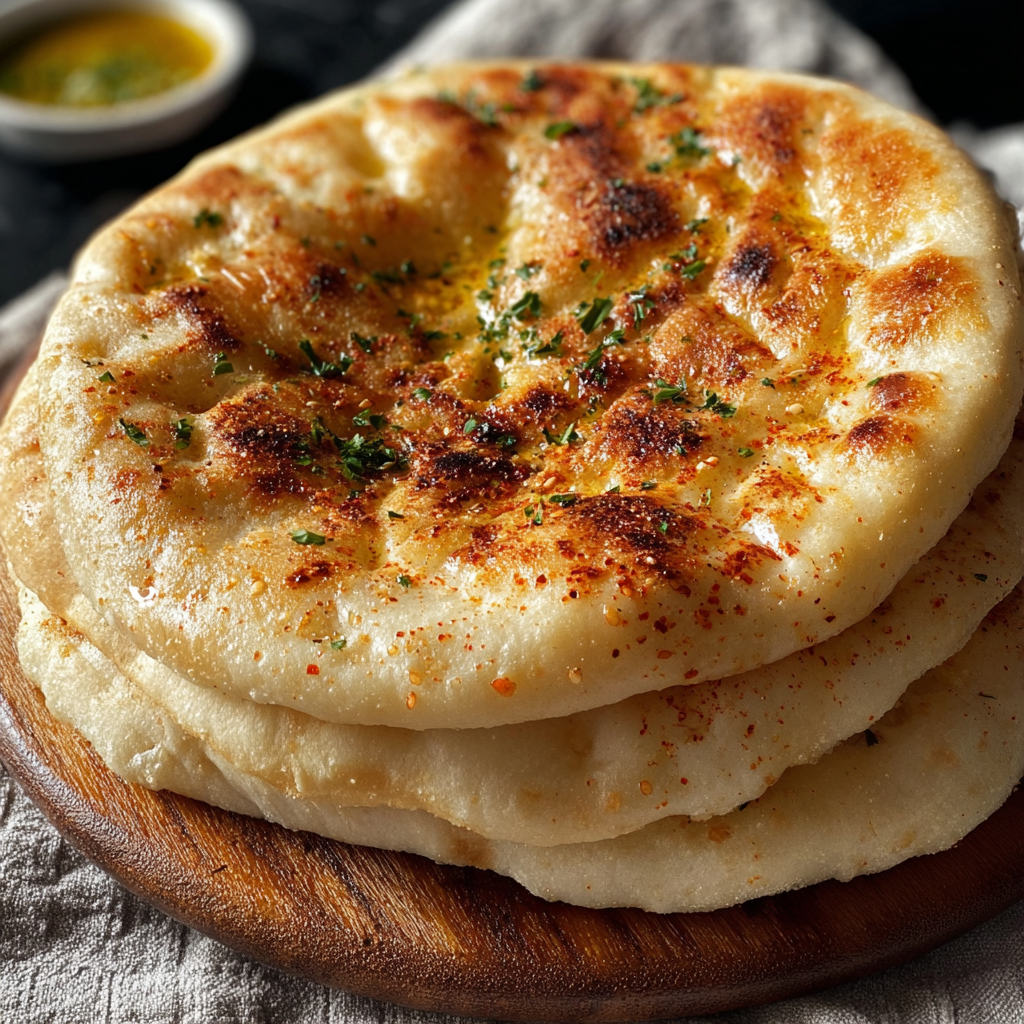
Soft, slightly puffed Turkish-style flatbreads cooked on the stovetop — no oven required. Ready in about 90 minutes including proofing; perfect for sandwiches, dips, or fresh from the pan.

This stovetop Turkish bread has been my quiet weekday hero ever since I realized you don’t need a hot oven to get soft, pillowy flatbreads with those beautiful pocket bubbles. I first developed this method on a rainy afternoon when my oven was out of commission and I still wanted warm bread for a simple family dinner. The result surprised me: tender crumb, crisp exterior where it kisses the pan, and those satisfying air pockets that puff up like little balloons. It quickly became our go-to for wraps, dunking into stews, and scooping spicy tomato salads.
What makes this loaf special is the balance of a soft interior and a slightly charred exterior from the direct pan heat. The dough is forgiving — a straightforward mix of flour, warm milk and water, yeast, a touch of sugar, and salt — and the technique focuses on controlling pan temperature and steam so the bread rises beautifully without burning. These rounds measure about 18 cm (7 inches) and are perfect for sharing. I’ll walk you through the small details and troubleshooting cues that make this technique reliable on any stovetop.
I remember the first time my kids saw the bread puff into a balloon on the stovetop — their faces lit up with delight. It’s a small everyday magic that turned a rainy night into a communal event; we split the rounds, filled them with simple grilled vegetables and yogurt, and savored the joy of something warm and handmade. Over time I’ve refined the proofing window and pan choice, and the results are reliably good: tender, slightly glossy, and full of personality.
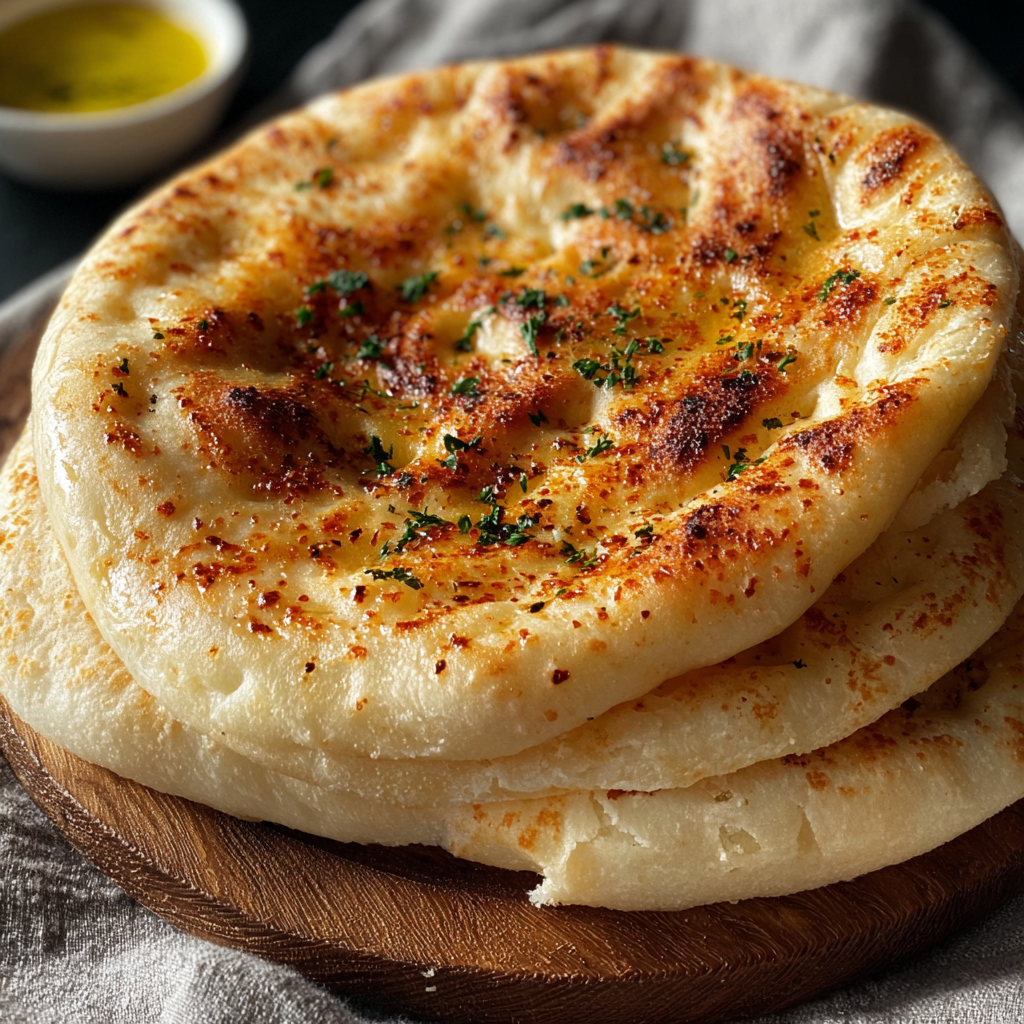
My favorite part is how forgiving the dough is: even if you under-knead slightly, the one-hour rest and warm pan coax a lovely structure. On a busy weeknight I’ll shape all six, cook two immediately, and freeze the rest flat-packed to reheat later. Guests are always surprised when they learn the bread was made entirely on the stovetop without an oven involved.
To store, cool bread completely on a rack, then place in an airtight container or resealable bag. At room temperature they’ll stay fresh for 1–2 days; refrigerating shortens freshness due to drying, so refrigerate only if you plan to use within a few days. For longer storage, freeze in a flat stack with parchment between pieces and a tight freezer bag — this prevents sticking and lets you defrost single rounds quickly. Reheat frozen rounds directly in a hot skillet for 30–60 seconds per side or wrap in a damp towel and microwave 20–30 seconds for a softer result. Look for limp texture or off odors as indicators that the bread has deteriorated.
If you need to adjust for dietary needs, swap whole milk for unsweetened plant milk (soy or oat keep a similar mouthfeel). To make dairy-free, brush with olive oil instead of butter. For a chewier texture use bread flour; for a softer, more tender result use all-purpose flour. If you have active dry yeast instead of instant, dissolve it in the warm liquid and wait 5–7 minutes until bubbly before adding flour. Reduce salt slightly if using salted butter for finishing. Adding up to 2 tablespoons olive oil to the dough will yield a softer crumb if preferred.
Serve these rounds warm with olive oil and za'atar, stuffed with grilled vegetables and halloumi, or alongside a rich lamb stew. They make excellent sandwich bases — slice open and stuff with roasted eggplant, tomatoes, and tzatziki — or use them as scoops for hummus and muhammara at a mezze spread. Garnish with chopped parsley, sesame seeds, or a sprinkle of coarse sea salt for a rustic finish. For breakfast, spread with labneh, honey, and walnuts for a simple, delicious start.
This style of bread is inspired by flatbreads common throughout Anatolia and the eastern Mediterranean where stovetop and hearth cooking historically played large roles. Traditional Turkish breads range from thin lavash to thicker pide; the method here borrows the high-heat, quick-cook approach to create little rounds reminiscent of pide and bazlama, adapted for modern kitchens without ovens. Bread like this often accompanies soups, cheeses, and kebabs in regional home cooking and is celebrated for its ability to bring people together at the table.
Summer: keep it light — brush with olive oil and scatter fresh oregano or basil for a garden-fresh touch. Autumn/Winter: enrich the dough with 1–2 tablespoons of olive oil and serve warm with hearty stews and braises. Holiday twist: press sesame or nigella seeds on top before cooking for a festive finish. For spring, fold minced fresh herbs into the dough after the first knead for subtle aromatic lifts without changing technique.
For bulk prep, shape all rounds, flash-cook them on each side for 30 seconds to set the surface, cool, and freeze flat in parchment stacks. When ready to eat, finish them in a hot pan for 30–60 seconds per side to rehydrate and crisp. Alternatively, proof the dough overnight in the refrigerator for a slower flavor development — allow it to come back to room temperature for 30–45 minutes before rolling and cooking. Use airtight containers and wrap with a kitchen towel after cooking to keep the surface soft.
These small rounds are a reminder that simple ingredients plus careful attention to heat make everyday food feel special. Enjoy making them your own, whether brushed with butter and herbs for a quick side or transformed into a stuffed sandwich for a crowd.
Use a heavy-bottomed skillet (cast iron recommended) to get even heat and consistent puffing.
Keep finished breads covered with a clean towel to retain steam and softness while you cook the rest.
If the dough is sticky, rest it 10 minutes before continuing; the flour will hydrate and be easier to handle.
Roll to an even 5 mm thickness so the bread puffs uniformly.
Lower the heat when bread puffs and covers to finish cooking through without burning.
This nourishing stovetop turkish bread (no oven) recipe is sure to be a staple in your kitchen. Enjoy every moist, high protein slice — it is perfect for breakfast or as a wholesome snack any time.
Yes — freeze fully cooled rounds in a sealed bag for up to 3 months. Reheat in a hot skillet per side for 30–60 seconds or microwave wrapped in a damp towel for 20–30 seconds.
A thick heavy skillet like cast iron retains heat and promotes puffing. Thin pans don’t store heat well and the bread may not balloon.
Instant dry yeast can be mixed directly into warm liquids; if using active dry yeast, bloom it for 5–7 minutes first in the warm liquids.
This Stovetop Turkish Bread (No Oven) recipe makes perfectly juicy, tender, and flavorful steak every time! Serve with potatoes and a side salad for an unforgettable dinner in under 30 minutes.
Mix warm milk, warm water, sugar, and instant yeast in a bowl; let sit 3–5 minutes until slightly foamy or glossy. This wakes the yeast and ensures even fermentation.
Add flour and salt to the liquids and stir until a shaggy dough forms. Folding at this stage ensures even hydration before kneading.
Knead the dough by hand for 8–10 minutes until smooth and elastic; the dough should no longer be sticky and should hold a slight windowpane when stretched.
Place dough in an oiled bowl, cover, and let rise until doubled in a warm spot, about 1 hour. Proper rise ensures air pockets and a light interior.
Divide into 6 rounds, shape tightly, and cover with a plastic bag for 10–15 minutes to relax gluten for rolling.
Roll each piece to about 18 cm and 5 mm thick. Heat a heavy pan over medium, cook each side until bubbly and golden, lower heat and cover when it puffs to finish cooking without burning.
Brush hot rounds with melted butter or olive oil and sprinkle parsley if desired; keep covered to stay soft until serving.
Last Step: Please leave a rating and comment letting us know how you liked this recipe! This helps our business to thrive and continue providing free, high-quality recipes for you.
Leave a comment & rating below or tag
@cozycookscorner on social media!
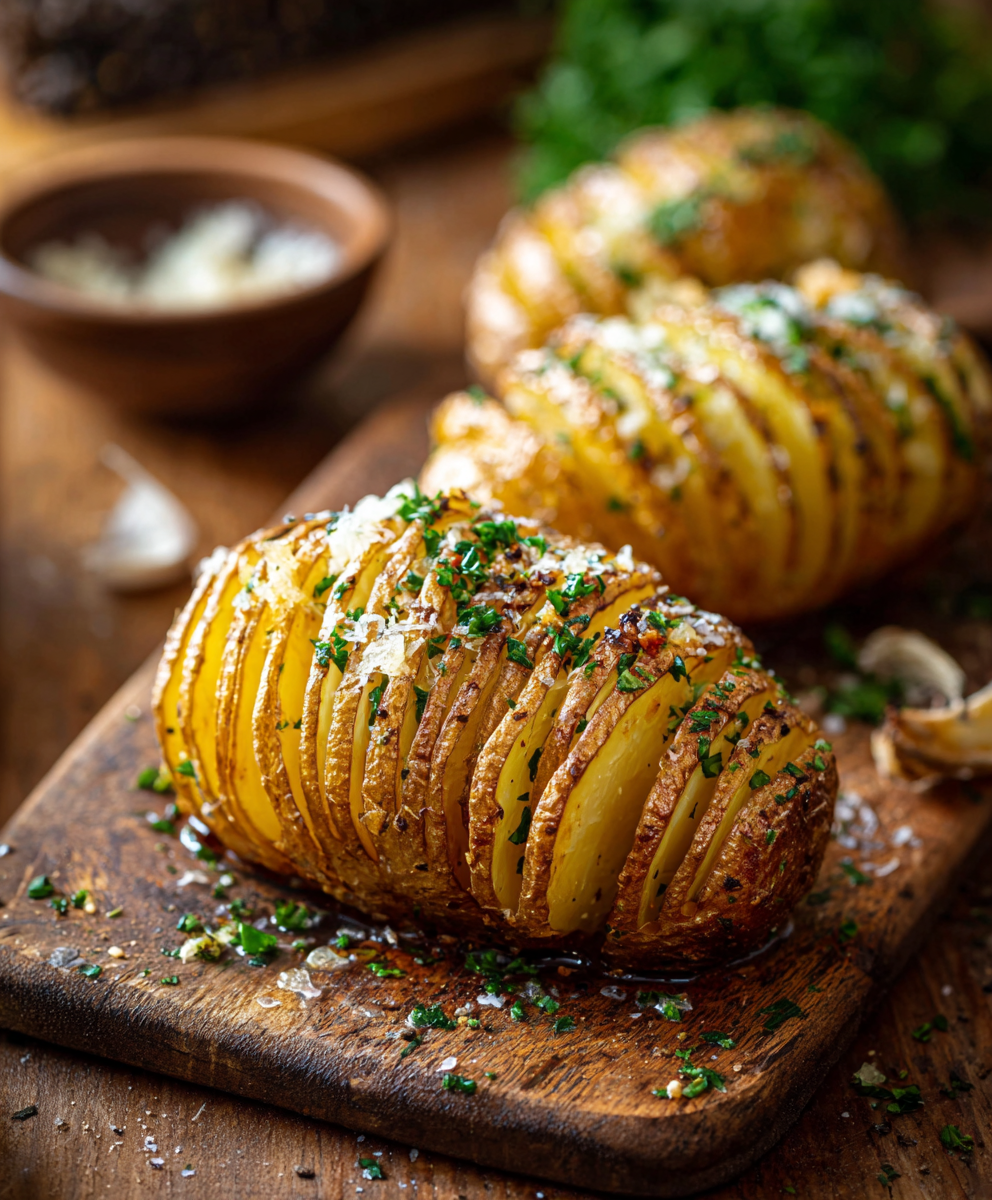
Thinly sliced, buttery, and golden-brown Hasselback potatoes—an easy, show-stopping side that crisps on the outside and stays tender inside.
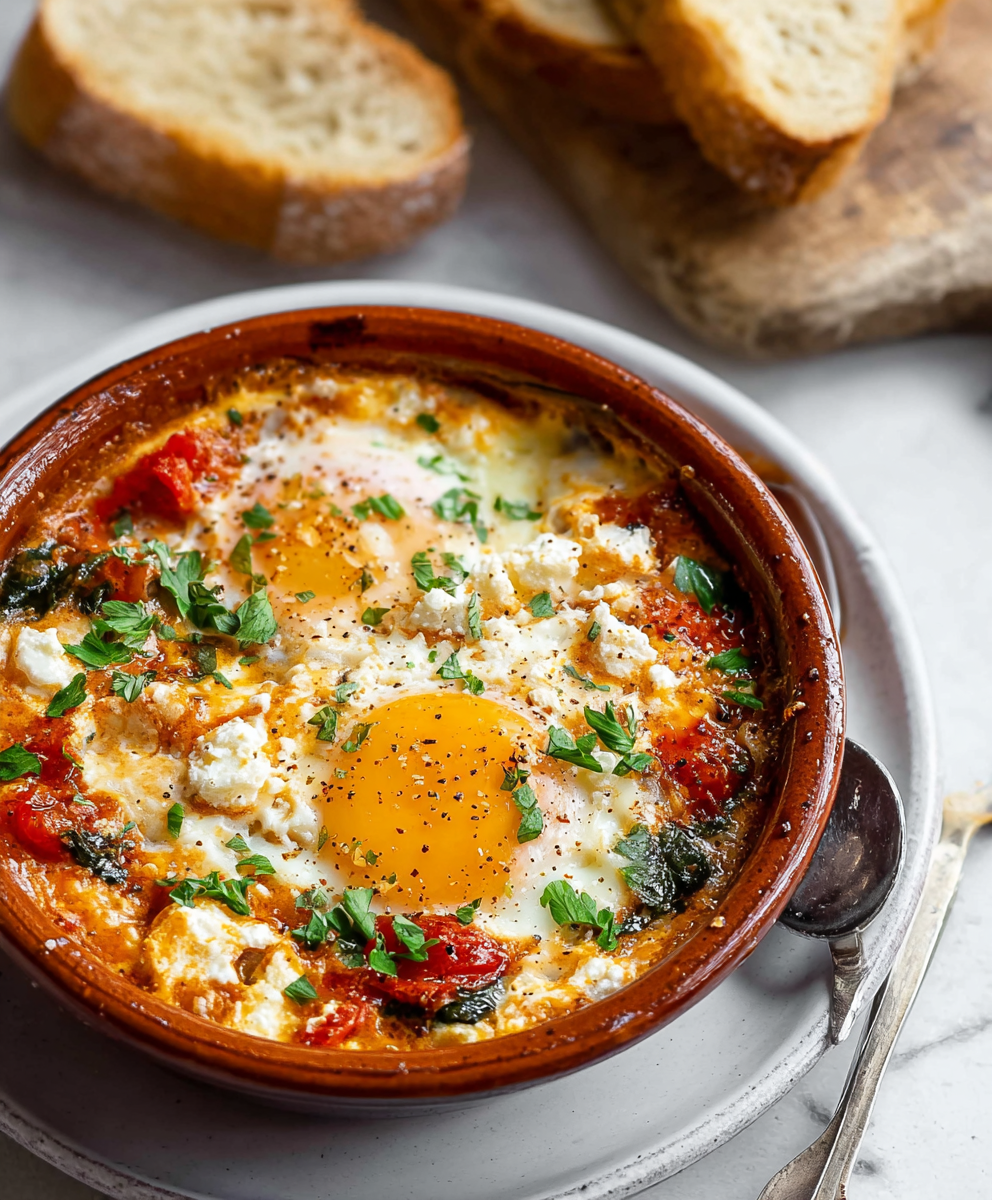
A vibrant oven baked dish of roasted tomatoes, tender feta, wilted spinach and baked eggs. Bright, tangy and perfect for breakfast or brunch with crusty bread.
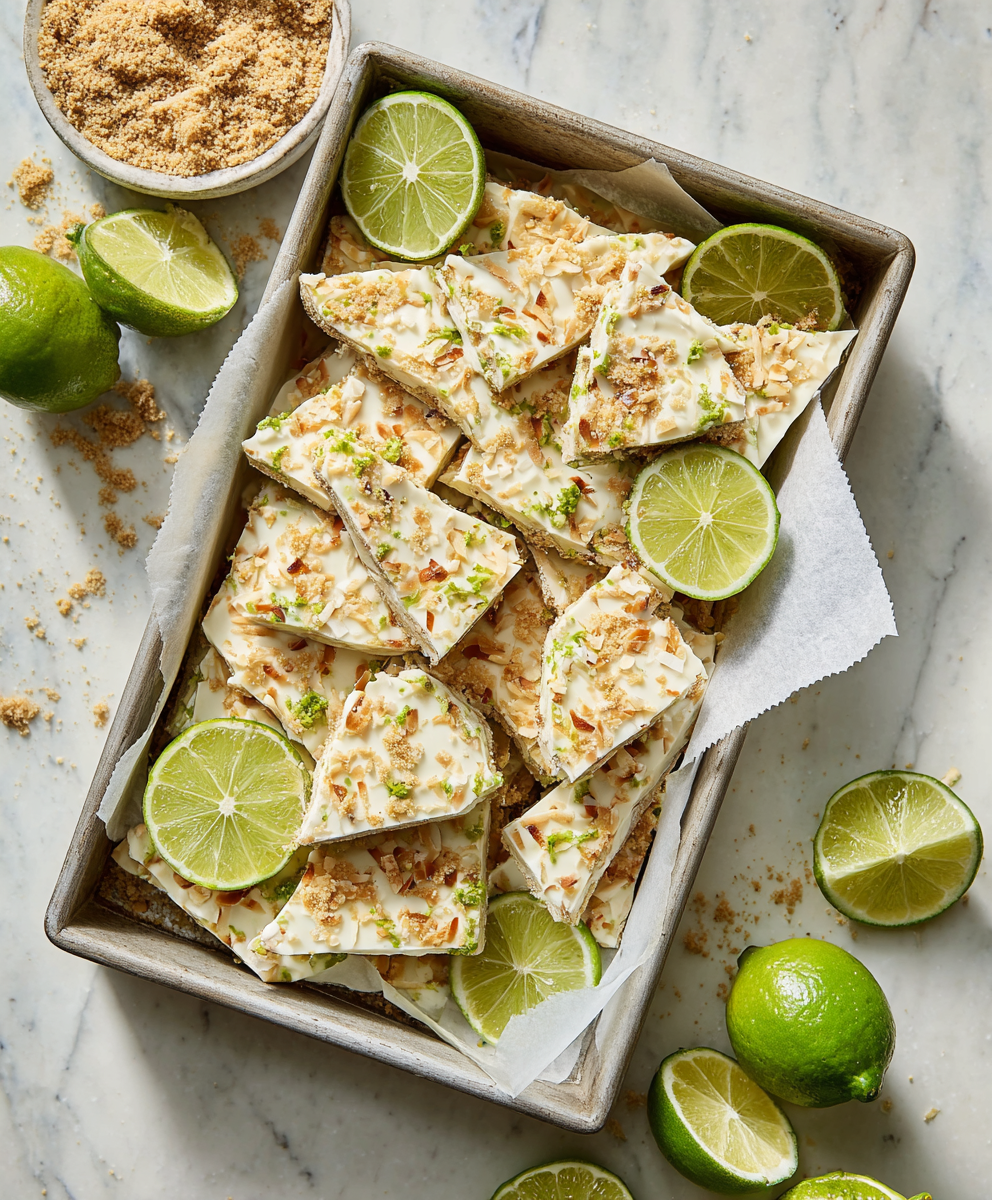
A bright, protein-packed frozen treat that captures the tart-sweet charm of key lime pie in a simple yogurt bark — perfect for hot days, make-ahead snacks, and gluten-free diets.
Leave a comment & rating below or tag @cozycookscorner on social media!
Enjoyed this recipe? Share it with friends and family, and don't forget to leave a review!
This recipe looks amazing! Can't wait to try it.
Comments are stored locally in your browser. Server comments are displayed alongside your local comments.

Join to receive our email series which contains a round-up of some of our quick and easy family favorite recipes.