>>
30-MINUTE MEALS! Get the email series now →


Pillowy, melt-in-your-mouth peppermint chews that are colorful, easy to shape, and perfect for holiday gifting — no cooking required.
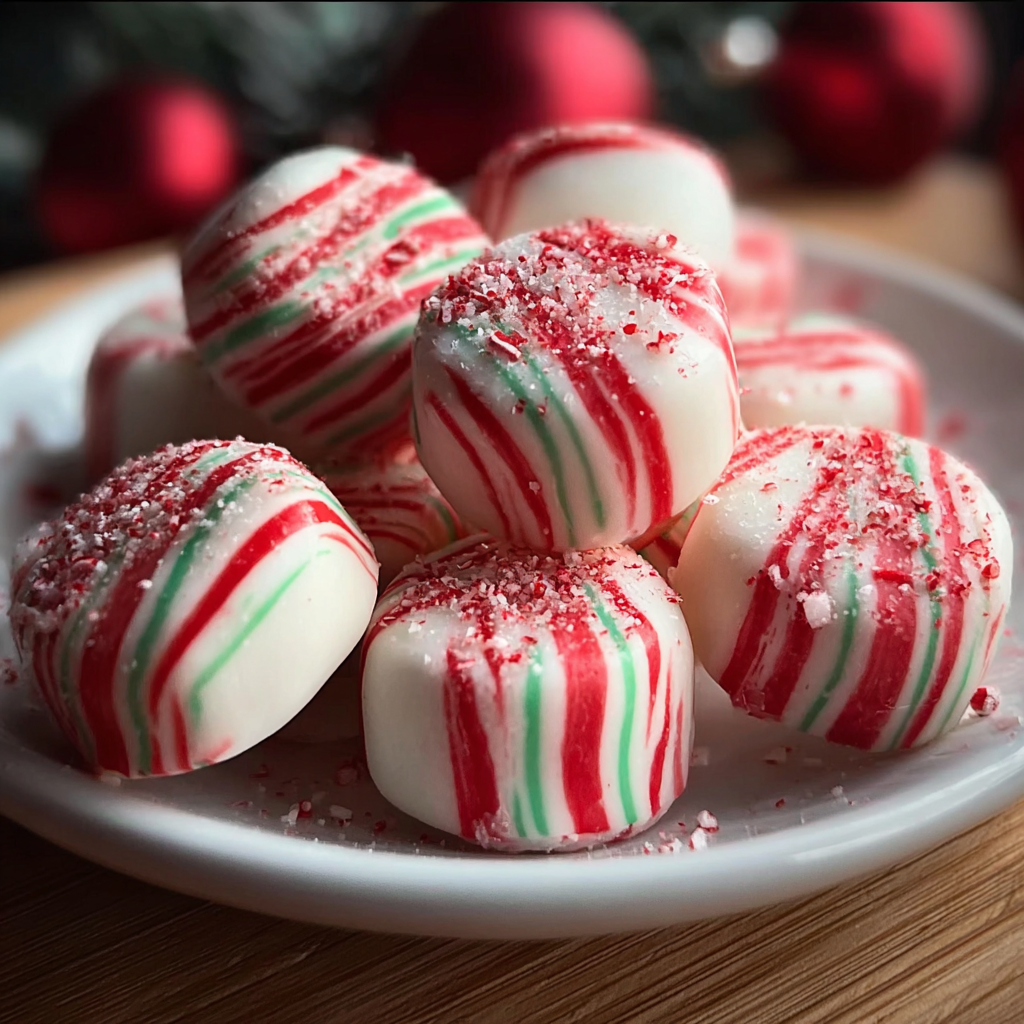
This collection of soft Christmas peppermint chews is one of those recipes I reach for every December. I first made them ten years ago during a frantic week of cookie-baking when my oven was already full and I wanted something bright and pepperminty that required almost no heat. The result was a tray of soft, tender mints with a satiny finish that the whole family kept popping into their mouths. They quickly became my go-to edible gift for neighbors and the centerpiece on our holiday cookie plates.
What makes these chews special is their texture: not hard like classic candy canes, but tender and slightly chewy, with a cooling peppermint hit that lingers. They’re forgiving to shape, forgiving to flavor adjustments, and they hold color beautifully for striped or marbled designs. Because they’re no-bake, they’re ideal for small kitchens and last-minute batches; once you learn the simple dough-like consistency to look for, the rest is easy. I often make a double batch and keep extras chilled — they stay soft and inviting for weeks when stored properly.
My family’s reaction the first time I made these was immediate: a chorus of “more, please.” Neighbors who received tins came back asking for additional batches the following year, and I loved that a simple, no-cook technique created something so festive. The peppermint aroma alone signals the holidays in our home, and carving out 30 minutes to make a tray feels like a small, joyful ritual each season.

My favorite part is the way these confections bring people together — my kids love twisting the ropes for stripes, and neighbors always remark on the fresh peppermint scent when they open the tin. Once I started adding a hint of vanilla, everyone noticed the flavor felt more rounded and less sharp. Small techniques like chilling briefly or using gel color instead of liquid make a big difference in final presentation.
Store the peppermint chews in an airtight container at cool room temperature or in the refrigerator. If stacking, separate layers with parchment to avoid sticking. At room temperature they keep 10–14 days; refrigerated in a sealed tin they’ll retain texture for 2–3 weeks. For long-term storage, freeze in a single layer on a tray until firm, then transfer to a zip-top bag or freezer-safe container with parchment between layers. Thaw at room temperature for 30–45 minutes before serving to restore the tender chew.
If you prefer to avoid corn syrup, substitute an equal amount of light agave syrup — note the texture will be slightly softer and the flavor a bit different. Swap coconut oil for refined vegetable shortening if you want a truly neutral fat; the chews will be slightly less glossy. Use peppermint oil carefully (very concentrated) — start with 1/4 teaspoon and increase in small increments. For a softer mint, reduce powdered sugar by 1/4 cup and add 1 teaspoon extra corn syrup.
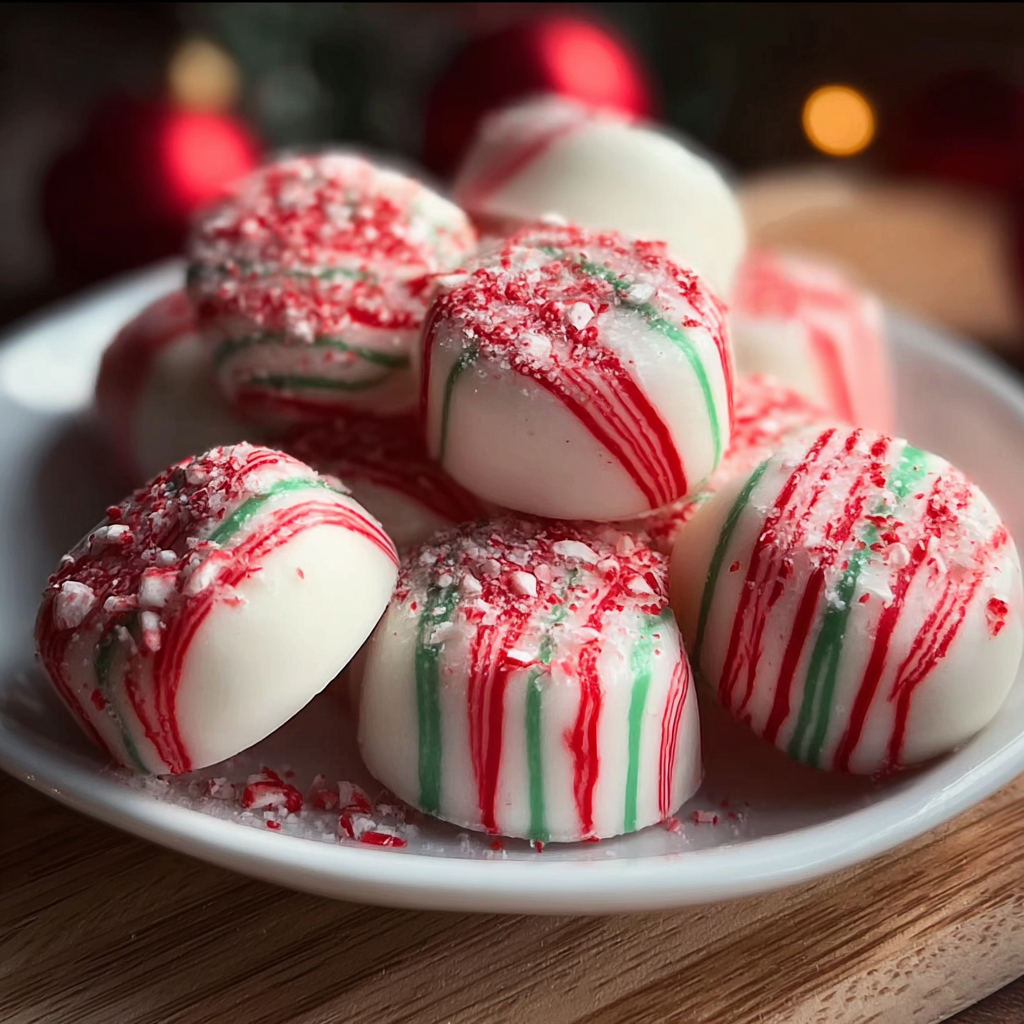
Arrange the chews on a festive plate or pack in small cellophane bags with holiday ribbon for gifting. They pair beautifully with hot chocolate, coffee, or spiced tea. For a party platter, mix plain and striped versions and scatter crushed candy cane for color. Mini muffin liners make elegant single-serve presentation and help with transport.
Peppermint-flavored confections have long been associated with winter holidays across Europe and North America. While hard candy canes are the most iconic form, soft peppermint chews are a nod to older traditions of fondant-style mints and molded sugar sweets that were made at home long before industrial candy dominated shelves. These tender versions echo that homemade heritage and allow for playful colors and shapes that modern cookie trays welcome.
At Christmas, classic red-and-white stripes or green swirls look festive; swap color to orange and brown for autumn harvest hues or pastels for spring celebrations. Add a touch of cocoa powder to the dough (about 1 tablespoon) for chocolate-peppermint chews, or fold in finely chopped crystallized ginger for a winter-warm twist. For Valentine’s Day, shape hearts and use pink gel coloring.
Make a double batch during a quiet morning and portion into small tins or jars for gifts. Store tins at room temperature and label with the date. Pre-crush candy canes and store them in a sealed jar to use immediately when the mints are ready. If preparing for a large party, form ropes and chill them on baking sheets, then slice as needed so they stay fresh and don’t dry out between serving times.
I gifted a batch to a neighbor who’d lost power during a storm; she told me the peppermint smell alone lifted her spirits. One year our church bazaar sold every tin within the first hour — people loved the soft texture and colorful stripes. My personal win was when my picky aunt, who seldom eats sweets, asked for the recipe. That’s when I knew the balance of peppermint and sugar was just right.
These soft Christmas peppermint chews are simple, joyful, and versatile — perfect for last-minute gifts, cookie exchanges, or a quiet afternoon of candy-making with the kids. Give them a try and make them your own: tweak the extract, play with color, and enjoy the handful of smiles they bring.
Sift powdered sugar before mixing to avoid gritty texture and to make kneading smoother.
Use gel food coloring to avoid adding extra liquid; gel keeps the dough consistent and the colors vivid.
If the mixture is sticky, dust your hands with cornstarch or powdered sugar rather than adding large amounts of sugar at once.
Chill briefly on a tray to firm up shapes and achieve a clean edge when slicing ropes.
For precise peppermint flavor, add extract gradually — it’s easier to add more than to rebalance if too strong.
This nourishing soft christmas peppermints recipe is sure to be a staple in your kitchen. Enjoy every moist, high protein slice — it is perfect for breakfast or as a wholesome snack any time.
Yes — store in an airtight container at room temperature for up to two weeks or refrigerated for up to three weeks. Freeze for up to three months layered with parchment.
Use gel food coloring for vibrant stripes. If using liquid color, add it sparingly and adjust powdered sugar to compensate so the dough doesn’t become too soft.
This Soft Christmas Peppermints recipe makes perfectly juicy, tender, and flavorful steak every time! Serve with potatoes and a side salad for an unforgettable dinner in under 30 minutes.
Line a baking sheet with parchment and sift 5 cups powdered sugar into a large bowl to remove lumps. Measure wet ingredients and have cornstarch ready for dusting.
Whisk 1/3 cup light corn syrup with 2 tablespoons solid coconut oil, 1 1/2 teaspoons peppermint extract, 1/4 teaspoon vanilla, and a pinch of salt. Emulsify until slightly shiny.
Combine wet mix with sifted sugar and stir until a firm paste forms. Knead in bowl until smooth and pliable, adding powdered sugar tablespoon by tablespoon if sticky.
Divide dough for colors if desired. Knead gel color into portions, roll into 1/2-inch ropes, twist for stripes, and slice into 1/4-inch rounds or shape into discs.
Press crushed candy cane onto edges or sprinkle on top. Arrange on parchment and chill 15–20 minutes to set slightly before packaging or serving.
Last Step: Please leave a rating and comment letting us know how you liked this recipe! This helps our business to thrive and continue providing free, high-quality recipes for you.
Leave a comment & rating below or tag
@cozycookscorner on social media!
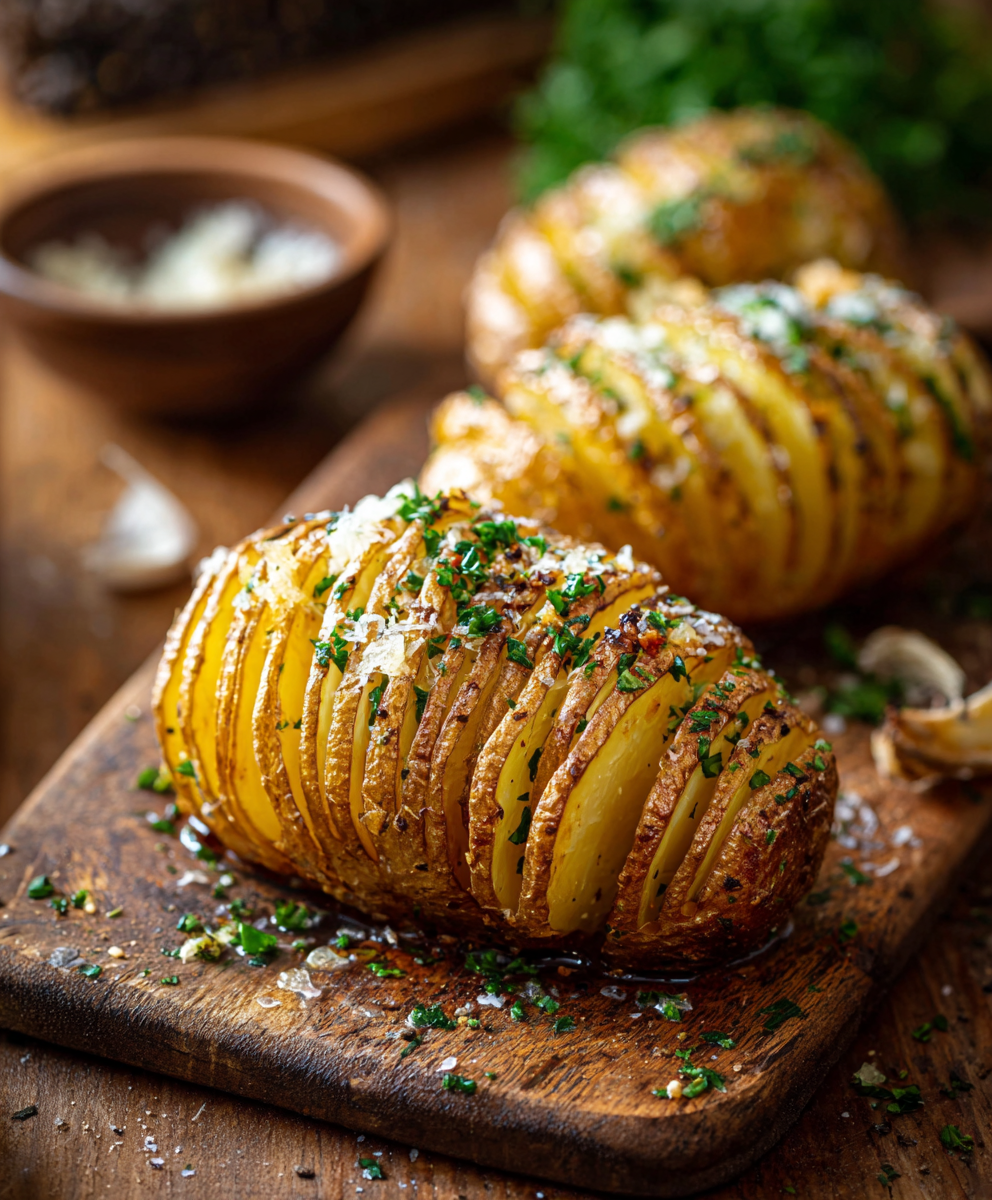
Thinly sliced, buttery, and golden-brown Hasselback potatoes—an easy, show-stopping side that crisps on the outside and stays tender inside.

A vibrant oven baked dish of roasted tomatoes, tender feta, wilted spinach and baked eggs. Bright, tangy and perfect for breakfast or brunch with crusty bread.
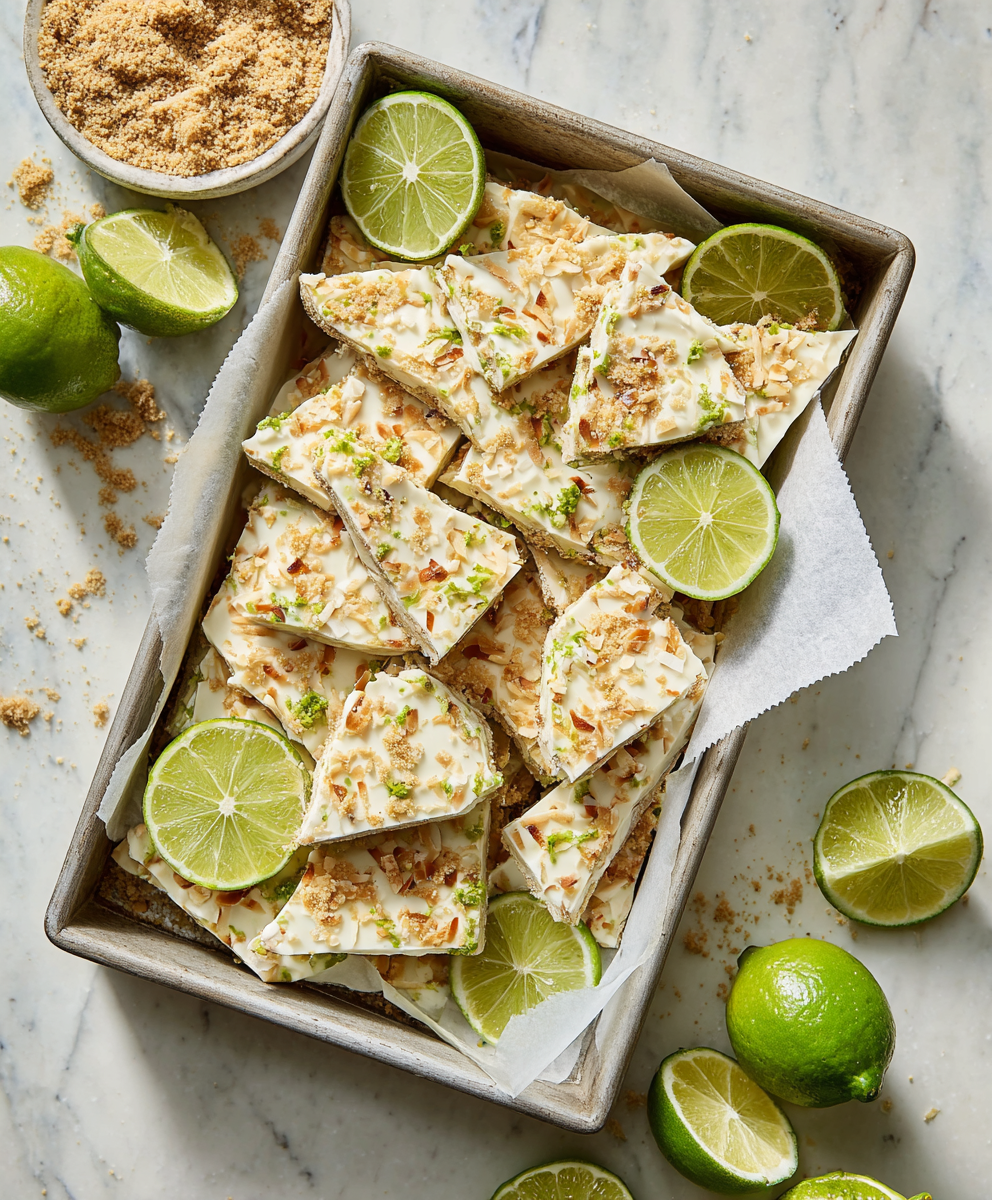
A bright, protein-packed frozen treat that captures the tart-sweet charm of key lime pie in a simple yogurt bark — perfect for hot days, make-ahead snacks, and gluten-free diets.
Leave a comment & rating below or tag @cozycookscorner on social media!
Enjoyed this recipe? Share it with friends and family, and don't forget to leave a review!
This recipe looks amazing! Can't wait to try it.
Comments are stored locally in your browser. Server comments are displayed alongside your local comments.

Join to receive our email series which contains a round-up of some of our quick and easy family favorite recipes.