>>
30-MINUTE MEALS! Get the email series now →


No-bake, nostalgic peanut butter and crisp rice bites coated in chocolate — an easy, crowd-pleasing treat that's perfect for parties, lunchboxes, or cozy nights in.
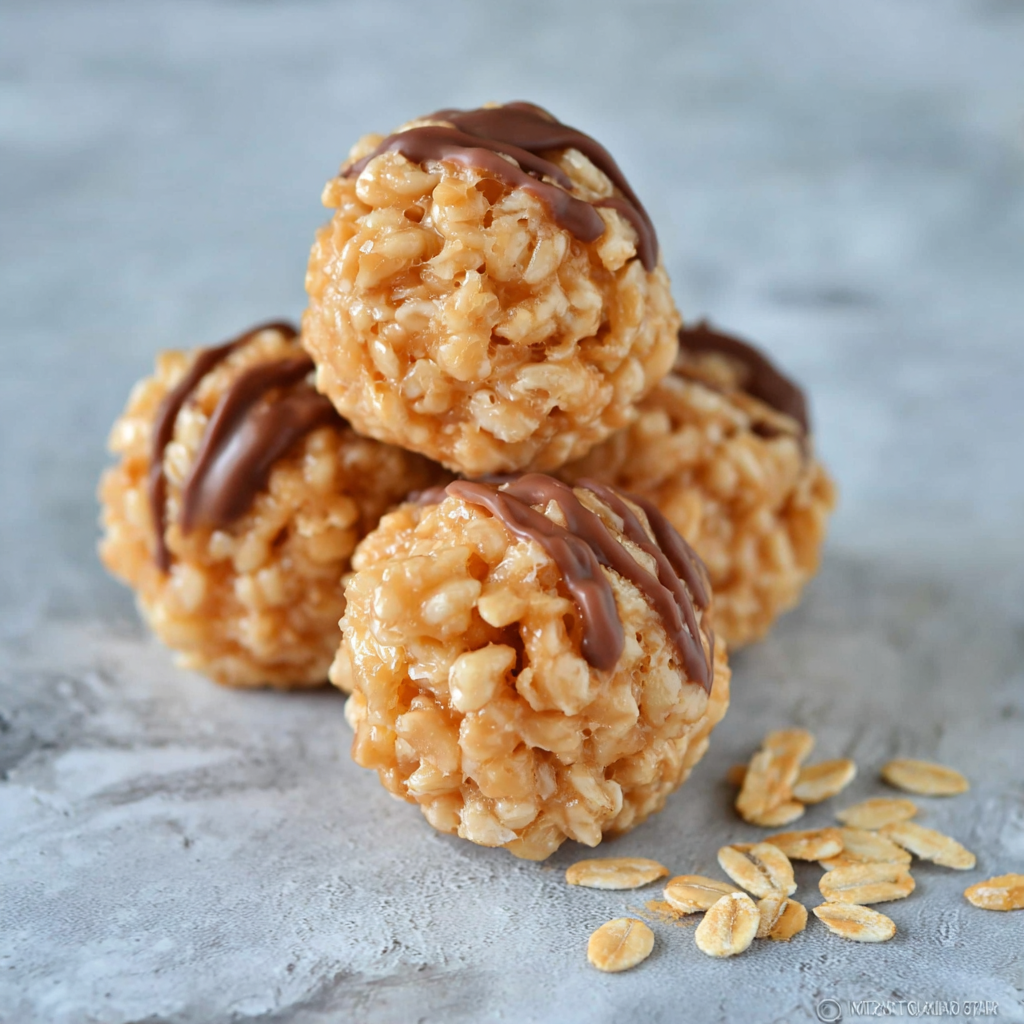
This recipe for Rice Crispy Peanut Butter Balls is my go-to answer when I want something sweet, nostalgic, and impossibly simple. I first made these on a rainy afternoon when the neighborhood kids were at my house after school; I wanted a snack that would come together quickly without turning on the oven. The mixture of creamy peanut butter, melted butter, and crunchy rice cereal hit that perfect balance of salty and sweet, with a delightful crunch that makes every bite pop. They became an instant favorite — my daughter declared them “magical” and my husband kept coming back for more, so they earned a permanent spot in our treat rotation.
These bites are special because they deliver texture and flavor with minimal effort. The peanut butter provides richness and savory depth while the rice cereal offers light, airy crunch. Coating them in chocolate adds a glossy finish and a restrained sweetness that doesn’t overwhelm the peanut butter. They’re also extremely flexible: swap chocolate for white chocolate, add sea salt, or roll them in coconut for a different experience. What began as a quick after-school fix has since accompanied birthday parties, potlucks, and travel picnics — they travel well and reliably disappear fast.
From my experience, these have consistently been the fastest items to vanish at gatherings. One Thanksgiving I made three dozen for kids and adults; they were the first plates emptied. The ease and reliability of this mix-and-form method are what keep me coming back — and the nostalgic crunch always sparks conversation.

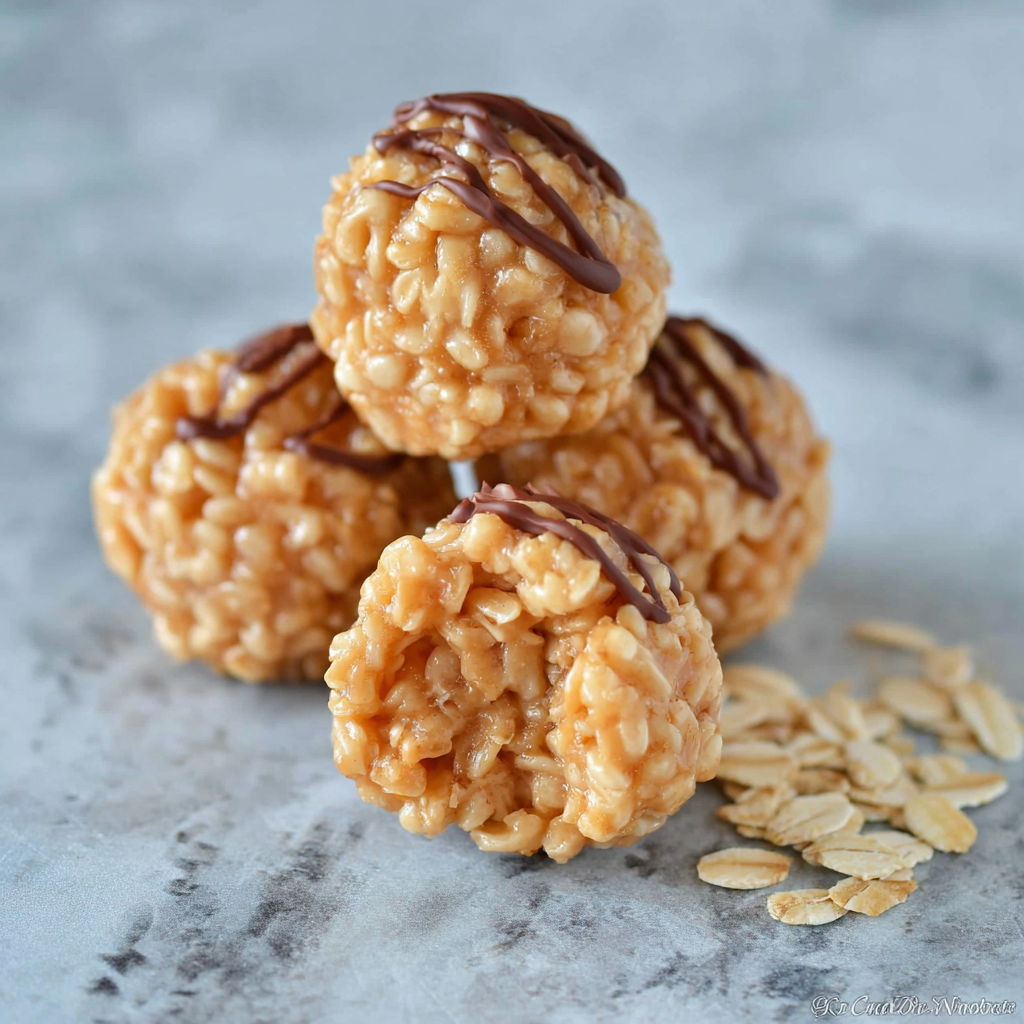
My favorite part is the satisfying crunch contrasting the smooth peanut center — it’s a simple textural trick but feels indulgent. Once, I brought a batch to a neighborhood potluck and someone asked for the recipe on the spot; nothing says success like instant requests for the pinch-me treat.
Store the balls in a single layer or with parchment between layers in an airtight container. At room temperature they’ll soften, so refrigeration is best to keep the chocolate firm and the interior stable — expect a firmer bite straight from the fridge. For longer-term storage, freeze on a tray until solid and then transfer to a freezer-safe bag; thaw in the refrigerator for 30 minutes before serving. Avoid temperature swings, which can cause the chocolate to bloom (white streaks) even though they’ll still taste fine.
If you need to swap ingredients, use sun butter or soy nut butter to replace peanut butter for allergy-friendly versions — reduce added salt since alternative butters vary in saltiness. For gluten-free needs, select crisp rice cereal labeled gluten-free. Replace butter with vegan butter and use dairy-free chocolate chips to make the finished item dairy-free. If you want a sweeter profile, use milk chocolate for coating; for a more adult, bittersweet result, choose dark chocolate with 60–70% cacao.
Serve these on a small platter with a mix of finishes: a dusting of cocoa powder, a sprinkle of flaky sea salt, or crushed roasted peanuts. They pair well with coffee or milk for dessert, and can be boxed in small cellophane bags for party favors. For brunch or a buffet, place them next to small fruit skewers or bite-size muffins to balance sweetness and provide variety.
Peanut butter confections trace back to early 20th-century America when peanut butter became widely available and affordable. These rice crispy peanut butter balls are a modern riff on classic no-bake combinations that celebrate convenience and texture — taking inspiration from both peanut butter confections and traditional rice crispy treats. They reflect the American love of portable, sweet bites perfect for potlucks and lunchboxes.
In winter, stir 1/2 teaspoon of cinnamon and a pinch of nutmeg into the mix for a warm spice note; top with a drizzle of candy cane pieces for holidays. For summer, skip heavy coatings and roll bites in toasted coconut or crushed freeze-dried raspberries for a lighter finish. Use pastel sprinkles for spring celebrations or mini chocolate chips for a kid-friendly twist.
Make the centers ahead and store uncoated balls in the refrigerator for up to 3 days. Keep the melted chocolate warm in a thermos or double boiler if coating several batches to save time. For portioning, use a 1-tablespoon scoop to create uniform bites that set evenly. Label storage containers with dates and any allergen notes if sharing with others.
These Rice Crispy Peanut Butter Balls are one of those small pleasures that turn ordinary moments into shared memories. Whether you’re packing them for a school snack, bringing them to a potluck, or making them for a cozy family movie night, they’re reliable, flexible, and always received with delight. Give them a try and make them your own — tweak the finish, slip in a pinch of salt, and enjoy the little crunch that brings everyone together.
Chill the formed centers before coating to prevent the cereal from becoming soggy during dipping.
Use a small cookie scoop for uniform balls so they set and display consistently.
Add 1 teaspoon of coconut oil to melted chocolate for a shinier glaze and easier dipping.
Press a sprinkle of flaky sea salt onto each chocolate-coated ball before the chocolate sets to enhance flavor.
This nourishing rice crispy peanut butter balls recipe is sure to be a staple in your kitchen. Enjoy every moist, high protein slice — it is perfect for breakfast or as a wholesome snack any time.
Store in an airtight container in the refrigerator for up to 7 days or freeze for up to 3 months. Thaw in the fridge before serving.
Yes — use dairy-free chocolate chips and vegan butter to make them dairy-free. Use sunflower seed butter for a nut-free version.
If the mixture is too sticky, add a tablespoon of powdered sugar at a time. If too dry, add a teaspoon of milk or water.
This Rice Crispy Peanut Butter Balls recipe makes perfectly juicy, tender, and flavorful steak every time! Serve with potatoes and a side salad for an unforgettable dinner in under 30 minutes.
Combine 1/2 cup creamy peanut butter and 1/4 cup unsalted butter in a small saucepan over low heat. Stir constantly until smooth and melted, about 2 to 3 minutes, then remove from heat.
Transfer warm mixture to a medium bowl and stir in 1 1/2 cups powdered sugar until well combined. Adjust texture with a teaspoon of milk if too dry or an extra tablespoon of powdered sugar if too sticky.
Gently fold in 3 cups crisp rice cereal until evenly coated, taking care to preserve crunchy texture and avoid crushing the cereal.
Use a small cookie scoop or tablespoon to portion and roll into 1-inch balls. Place on a parchment-lined baking sheet and chill in the refrigerator for at least 20 minutes to firm up.
Melt 8 ounces semi-sweet chocolate chips with 1 teaspoon shortening in 20-second microwave bursts, stirring between each until smooth. Alternatively, melt in a double boiler over simmering water.
Dip chilled balls into melted chocolate, tap off excess, and return to parchment. Sprinkle with flaky sea salt, chopped peanuts, or coconut before chocolate sets. Chill briefly to firm the coating.
Last Step: Please leave a rating and comment letting us know how you liked this recipe! This helps our business to thrive and continue providing free, high-quality recipes for you.
Leave a comment & rating below or tag
@cozycookscorner on social media!
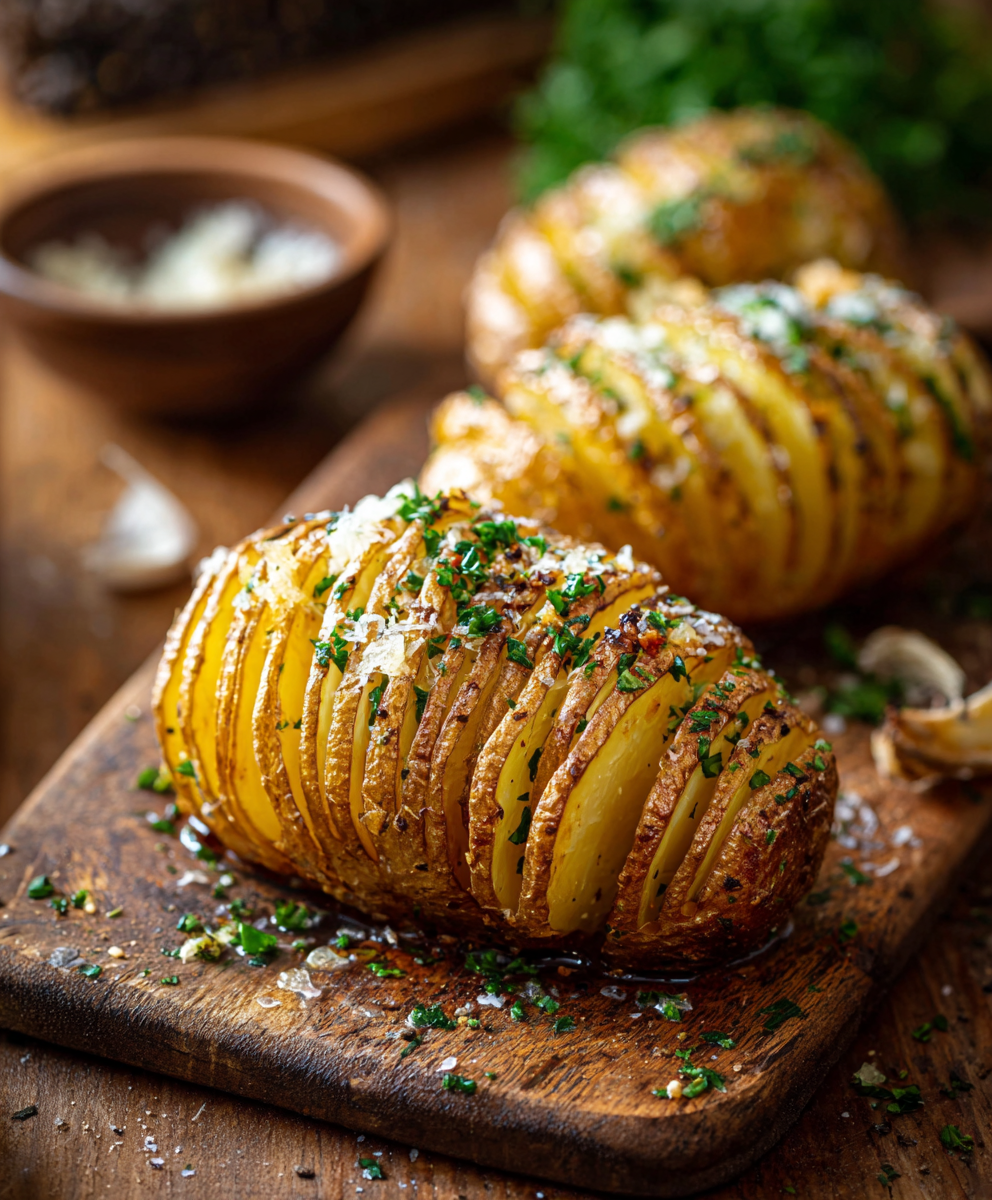
Thinly sliced, buttery, and golden-brown Hasselback potatoes—an easy, show-stopping side that crisps on the outside and stays tender inside.

A vibrant oven baked dish of roasted tomatoes, tender feta, wilted spinach and baked eggs. Bright, tangy and perfect for breakfast or brunch with crusty bread.
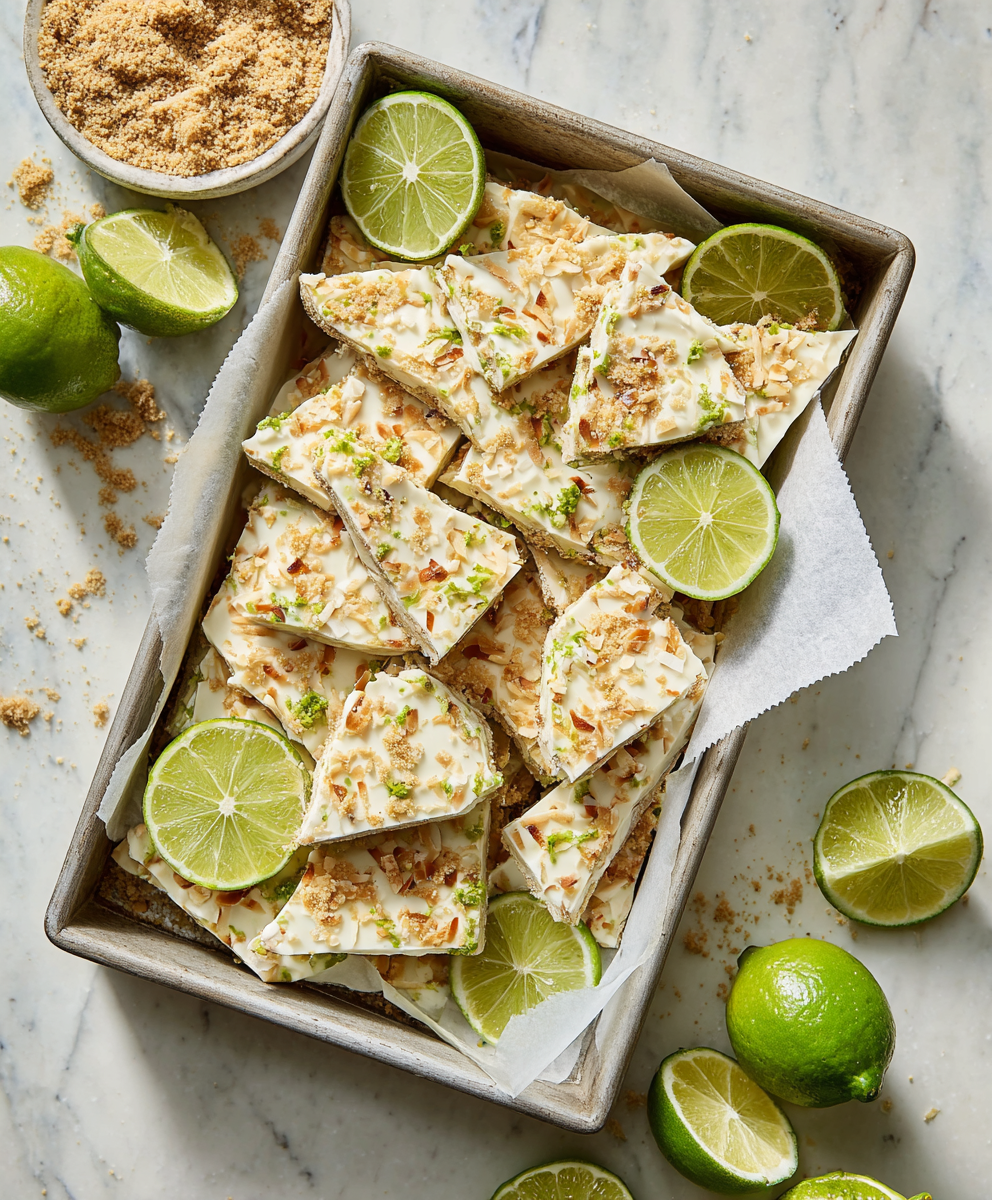
A bright, protein-packed frozen treat that captures the tart-sweet charm of key lime pie in a simple yogurt bark — perfect for hot days, make-ahead snacks, and gluten-free diets.
Leave a comment & rating below or tag @cozycookscorner on social media!
Enjoyed this recipe? Share it with friends and family, and don't forget to leave a review!
This recipe looks amazing! Can't wait to try it.
Comments are stored locally in your browser. Server comments are displayed alongside your local comments.

Join to receive our email series which contains a round-up of some of our quick and easy family favorite recipes.